

Team member access
On the "Access" tab the owner invites team members to the bot: an operator for conversations, a marketer for mailings, a scenario developer. Each gets a role — a set of permissions that determines which sections of the bot they see.
Only the bot's owner sees the tab.
Access to a bot and access to a project
Access is given at two levels:
- to one bot — on the "Access" tab in that bot's settings. The team member sees only this bot;
- to the whole project — in the project's "Access" section. The team member sees all bots of the project and its other sections.
The bot's tab shows only those who have access to this particular bot. Look for team members with access to the whole project in the project's "Access" section.
What you need to invite someone
- The team member's account. An invitation can be sent only to a registered user of the platform — to the email they sign in with.
- A role. Roles are created in advance in the "Access control" section of the main menu, on the "Permissions and roles" tab. How to set them up is below.
- A team seat. Every team member takes one seat, no matter how many of your bots and projects they work on. An invitation that has not been answered yet also takes a seat. The "Team seats" banner at the top of the tab shows how many seats are taken. What a seat costs is on the Prices of additional services page.
The team member does not need a subscription of their own.
How to give access
- Open the bot's "Settings", the "Access" tab.
- Click "Grant access".
- In the "Invite a team member" window, enter the team member's email and choose a role.
- Click "Send invitation".
The team member gets the invitation in the notifications section of their account and can accept or decline it. The invitation is valid for 3 days. While there is no reply, the team member has the "Awaiting reply until …" mark in the list.
Limits:
- no more than 100 users can be invited to one bot;
- no more than 100 invitations can be sent per day, and no more than 3 to the same person;
- if the person already has a role in this bot, a second invitation is not sent — change their role.
Changing a role or taking away access
In the team member's card on the "Access" tab:
- the pencil icon opens the "Edit role" window — choose another role and save;
- the bin icon takes away access. The platform asks: "Remove …'s access?";
- for an invitation that has not been answered yet, the bin cancels the invitation. The team seat it takes is freed.


The role's name has a dotted underline: hover over it to see the list of permissions.
Roles and permissions
A role is a name and a set of permissions. Roles are shared by your whole account: the same role can be assigned in different bots and projects. You can create up to 50 roles.
- In the main menu of your account, open "Access control".
- Go to the "Permissions and roles" tab and click "Add role".
- Enter the name, tick the permissions and click "Save".
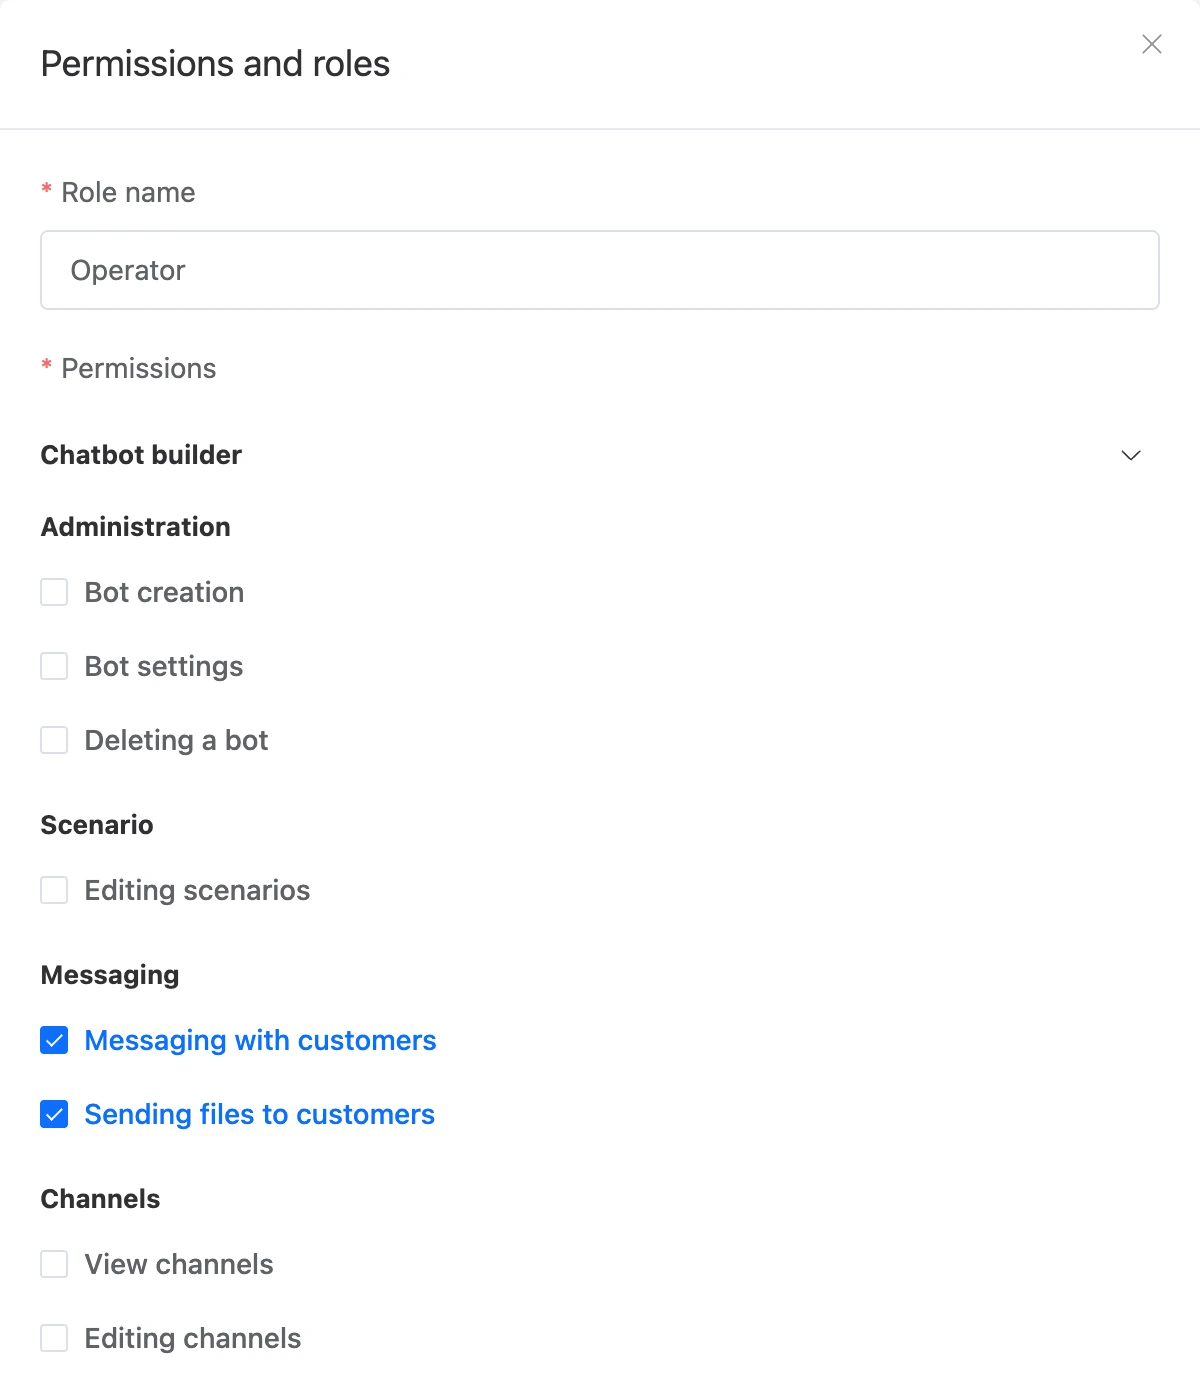
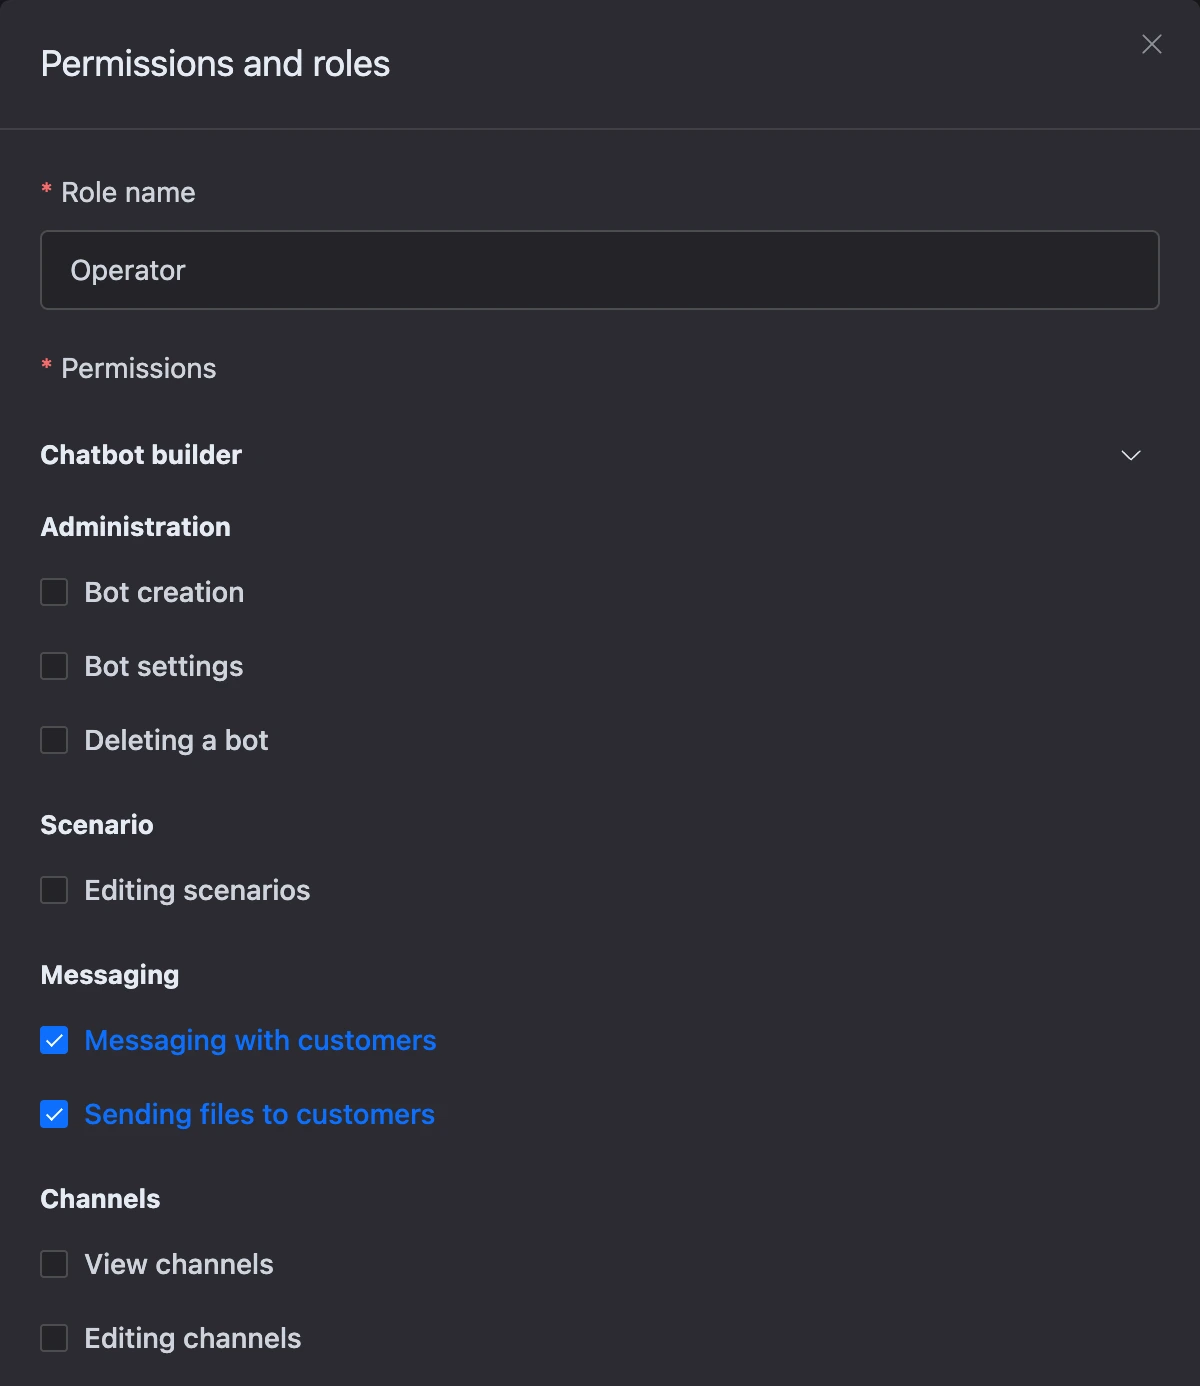
Permissions are grouped by the platform's sections. The "Chatbot builder" and "Lists" groups relate to chatbots.
Chatbot builder
| Group | Permission | What it opens |
|---|---|---|
| Administration | "Bot creation" | Creating bots in the project. Works in a role given for the whole project |
| Administration | "Bot settings" | The "Settings" section: notifications, integrations, policy. The "Access" tab stays with the owner only |
| Administration | "Deleting a bot" | Deleting the bot |
| Scenario | "Editing scenarios" | The scenario builder: the scheme and blocks, as well as the bot's contacts. The same permission is used to save the bot's name, language, time zone, additional settings and avatar |
| Messaging | "Messaging with customers" | The "Messages" section: reading conversations and replying |
| Messaging | "Sending files to customers" | Attaching files to replies in a conversation |
| Channels | "View channels" | The "Links to chatbot" section and the list of connected messengers |
| Channels | "Editing channels" | Connecting and disconnecting messengers, seeing channel tokens, changing the bot's profile in the messenger |
| Mailings | "Managing mailings" | The "Mailings" section |
| Downloading | "Download contacts" | The list of the bot's contacts and the archive with contacts |
| Downloading | "Download dialogs" | Downloading the archive with conversations |
| Downloading | "Download requests" | Downloading the archive with requests |
| CRM | "CRM administration" | The whole "CRM" section |
| CRM | "Manage own deals" | In the CRM — the deals where the team member is the assignee |
| CRM | "Manage unassigned deals" | In the CRM — the deals without an assignee |
| Analytics | "View analytics" | The "Statistics" section |
| Analytics | "View conversions" | Showing conversions on the bot's scheme |
Lists
Lists belong to the project and are available to all its bots, so the permissions for them stand separately. Lists are covered in the Lists section.
| Group | Permissions | What they open |
|---|---|---|
| Lists | "Viewing lists", "Creating lists", "Editing lists", "Deleting lists" | The "Lists" section in the bot's menu and actions with the lists themselves |
| List records | "Viewing records", "Creating records", "Editing records", "Deleting records" | Actions with records inside a list |
Tip
An operator usually needs only the "Messaging with customers" and "Sending files to customers" permissions. Someone who builds the scenario needs "Editing scenarios" and the permissions for lists.
If you delete a role, all team members it is assigned to lose access to your projects and bots.
How to leave a bot
A team member can give up access to someone else's bot themselves:
- In the main menu of your account, open the list of projects.
- In the "Available chatbots" group, click the bin icon next to the bot.
- Confirm: "Access to the bot will be closed. Are you sure you want to leave this bot?"
After that, only the owner can give the access back — with a new invitation.
If something does not work
- "A user with this email already has a role in this bot." Do not invite again — change the role with the pencil icon.
- The invitation was sent, but the team member does not see it. Check the email: the invitation reaches only someone who is registered on the platform with this address. After 3 days the invitation stops being valid — send a new one.
- "There are no free team seats…" or "Team seats are not paid…". Add or pay for seats — the buttons for this are on the "Team seats" banner.
- "The bot is being transferred to another account…" While the bot is being transferred, the list of team members cannot be changed. Wait until the transfer is completed or cancel it.
- A team member cannot accept the invitation. If the owner's team seats are not paid, the invitation is not accepted until they are paid.