

Canvas and toolbars
A scenario's scheme lies on a canvas — a field without borders that you can move and zoom, like a map. This page covers everything about the canvas itself. How to add and connect blocks is described on the Blocks page.
Moving and zooming
| What to do | Mouse | Trackpad | Phone |
|---|---|---|---|
| Move the scheme | Hold the mouse button on an empty spot and drag. The middle mouse button moves the scheme even when box selection is on | Scroll with two fingers | Drag with one finger |
| Change the zoom | Mouse wheel | Pinch two fingers in or out | Pinch two fingers in or out; a double tap zooms in |
The wheel with the Ctrl key held (⌘ on a Mac) changes the zoom both with a mouse and with a trackpad. The Ctrl + 0 (⌘ + 0) shortcut brings the zoom back to 100%.
The builder detects on its own whether you have a mouse or a trackpad. If it gets it wrong — the scheme scrolls instead of zooming or the other way round — choose the device manually: click the percentage on the zoom panel and tick "Mouse" or "Trackpad" in the "Mouse / Trackpad" group. The "Auto" option brings automatic detection back.
The zoom panel
The panel sits at the right edge of the canvas. It is not shown on a phone.
- "+" and "−" — zoom in and out.
- The percentage — the current zoom. Click it to choose 50%, 75%, 100%, 150% or 200%, turn on the "Full screen" mode or choose the control device. To leave full screen, use the "Normal mode" item or the button in the top left corner.
- The pointer arrow — brings the scheme back to the scenario's start block.
- "Box selection" — the selection tool, described below.


The minimap
The button with a map on the bottom toolbar turns on the minimap — a scaled-down scheme in the bottom right corner. It shows blocks and notes, and a frame marks the part of the scheme that is on the screen now. Click the minimap or drag across it to go to another part of the scheme. The minimap is resized by its top left corner.


There is no minimap on a phone.
The top toolbar
On the left:
- The back arrow — returns to the project, to the list of bots.
On the right, in order:
- "Connect messenger" — opens the channel connection window. Once at least one channel is connected, the button is replaced with a link icon — "Manage messengers". The button is visible to those who have access to the bot's channels. Channels are covered in the Connecting channels section.
- The magnifier — block search, see below.
- The palette — "Map color and grid", see "The scheme's appearance".
- The crossed-out connection — "Hide empty connections". Removes from blocks the outputs that lead nowhere: on a large scheme only the working branches remain. While empty outputs are hidden, you cannot draw a new connection from them — click the button again to bring them back.
- "AI help" — opens a chat with the AI that can build and edit this scenario. The chat already knows which bot and scenario you are working with. No subscription is needed for this, only AI tokens are paid for — see What is available without Pro. Building a bot with AI is covered in the Managing bots section.
- "Test the bot" — opens the built-in chat with the bot. See the Testing the bot page for details.
- "Add a block" — opens the "Block creation" window.


On a phone, the buttons keep only their icons, and the "Connect messenger", palette and "Hide empty connections" buttons are not shown.
The bottom toolbar
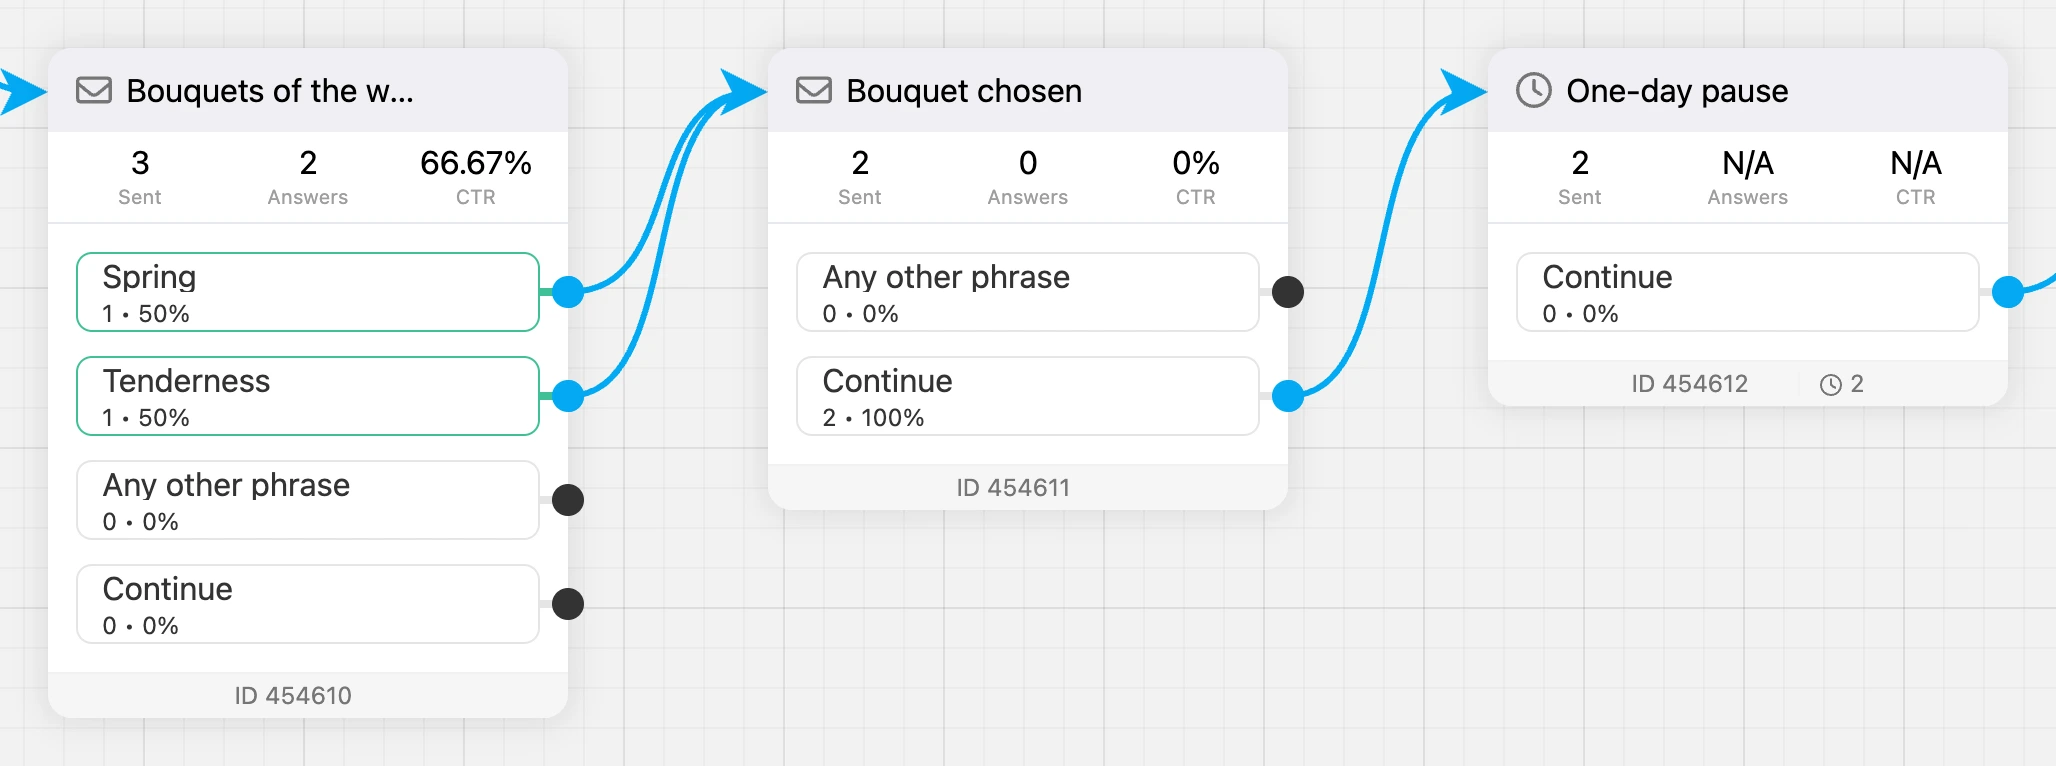
- The pie chart — conversions. Every block gets the "Sent" and "Answers" numbers and the CTR, and every output shows how many times it was followed. The period is chosen with the "Today", "Yesterday", "Week", "Month", "Quarter", "Year" buttons or in the calendar. The "Unique" checkbox counts every person once. The cross removes the numbers from the scheme. The button is visible to those who have access to conversions; it is not shown on a phone. The rest of the bot's statistics is in the Statistics section.
- The map — the minimap.
- The scenario name — the list of the bot's scenarios. See the Scenarios page for details.


Block search
Click the magnifier on the top toolbar and start typing a block's name or its ID — that is exactly what the field says: "Block name or ID". The list shows up to 30 matching blocks. Choose the one you need — the scheme moves to it, and the block is highlighted for a second.


The search covers the blocks of the open scenario. To make blocks easy to find, give them names: the block's menu → "Rename".
Tip
A block's ID is shown at the bottom of the block. It is handy for finding a block a colleague wrote to you about or one mentioned in a log.
The scheme's context menu
Right-click an empty spot on the canvas. On a phone, touch an empty spot and hold your finger.
- "Add block" — opens the "Block creation" window; the new block is placed at this point.
- "Paste" — pastes the copied blocks and notes at this point.
- "Add note" — creates a note.
- "Grid" — the grid type and background color.
- "Mouse / Trackpad" — the control device: "Auto", "Mouse", "Trackpad".


Selecting several blocks
There are three ways to select blocks:
- With a checkbox. Hover over the icon in the block's header — a checkbox appears in its place.
- With a click and a key. Click a block with Shift held (or ⌘ on a Mac) — the block is added to the selection. Another click removes it from the selection.
- With a box. Hold Shift and drag a box across an empty spot on the canvas: all blocks and notes it touches are selected. If you need to select a lot, turn on the "Box selection" tool on the zoom panel — then the box is drawn without Shift, and the scheme is moved with the mouse while Space is held. A box drawn with Shift held adds blocks to those already selected. The Esc key cancels the box.
When something is selected, the "… blocks selected" counter and these buttons appear on the left of the top toolbar:
- "Select all" — selects all blocks and notes of the scenario.
- "Delete" — deletes the selection after a confirmation.
- "Copy" — copies the selection to the clipboard.
- "Cancel" — clears the selection. The Esc key does the same.


Selected blocks move together: drag any of them. Notes selected together with blocks move with them.
You can select no more than 1000 blocks at a time. If there are more blocks, the builder warns you: "Not all blocks are selected!"
Copying and pasting
- Select the blocks and click "Copy" on the top toolbar or press Ctrl + C (⌘ + C). A single block can be copied from its menu: "Copy".
- Open the place where you want to paste them: the same scenario, another scenario or another bot.
- Hover over an empty spot on the canvas and press Ctrl + V (⌘ + V) — or open the context menu and choose "Paste".
The blocks are placed where the cursor was. The connections between the copied blocks are kept, and notes stay in their places relative to the blocks. The pasted blocks are selected right away — you can move them all together.

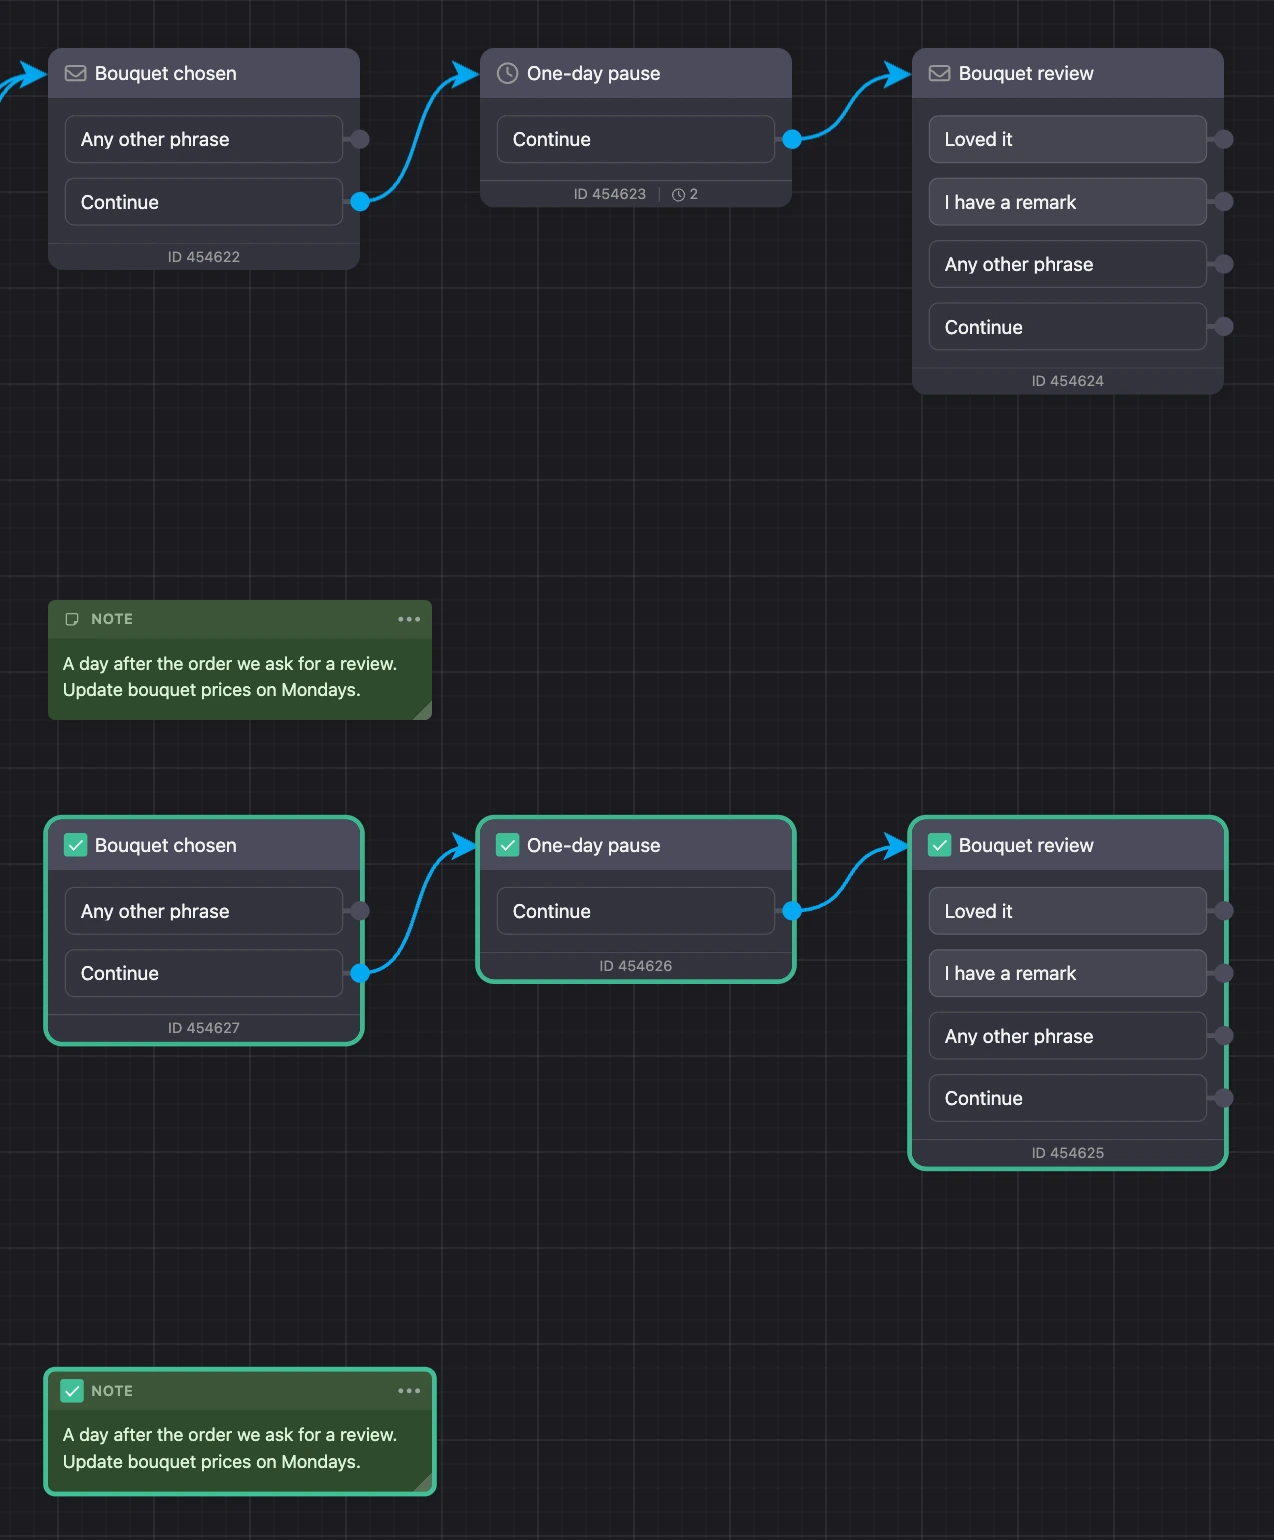
The keyboard shortcuts work while the cursor is over the canvas and you are not typing in an input field.
Note
The "Duplicate" item in a block's menu makes a copy of one block next to it, without the clipboard.
Notes
A note is a colored sheet with text right on the scheme. Notes take no part in the conversation with a person: you and your colleagues need them to label the scenario's branches, leave a reminder or explain a tricky spot.
- Add. The scheme's context menu → "Add note".
- Write the text. Click the note and type. The text is saved when you click outside the note or press Ctrl + Enter (⌘ + Enter). Esc cancels the edit.
- Resize. Drag the bottom right corner. If the text does not fit, the sheet stretches on its own.
- Change the color. The "⋯" menu in the note's header: yellow, green, blue, pink, purple, gray.
- Copy or delete. The "Copy" and "Delete" items in the same menu. For a note with text, the builder asks you to confirm: "Delete the note? It cannot be restored."


Notes are moved, selected and copied just like blocks. They lie under the blocks, so a large note can serve as a background for a group of blocks.
One scenario holds up to 200 notes, one note — up to 20,000 characters.
The scheme's appearance
The button with a palette on the top toolbar opens a window with three steps:
- "Choose color scheme" — the canvas background color. The look of blocks and arrows changes together with the background. The dark theme of the account has its own set of colors.
- "Choose grid type" — "Lines", "Dots" or "Disable grid".
- "Select control method" — "Auto", "Mouse" or "Trackpad".


The first time you enter the builder, this window opens on its own. The grid and the background color can also be changed through the scheme's context menu — the "Grid" item.
The color and the grid are remembered in your account and apply to all bots. The control method, the "Box selection" tool and the hiding of empty connections are remembered in the browser — on another computer you need to turn them on again.
Numbers on blocks
- The ID at the bottom of a block — the block's number. Click to copy it.
- A clock with a number — "Waiting to be sent". Shows how many contacts are now waiting at a "Delay" or "Timer" block. The test contact from the "Bot test" window is not included in this number.
- "Sent", "Answers", CTR — appear when conversions are turned on in the bottom toolbar.

Limits
- One scenario — no more than 2500 blocks.
- One scenario — no more than 200 notes.
- No more than 1000 blocks can be selected at a time.
If a scenario is getting close to the block limit, split it into several — see Scenarios.