
HTML widget
The block sends a widget — a small interactive card right in a message: a poll, a quiz, a calculator, a timer, a wheel of fortune. The person taps in the card, and the bot gets the answer and moves on through the scenario, as after a button press.
The widget is shown in private Telegram chats and in the website chat. Contacts from other messengers go down the "Widget not shown" output — connect it to a regular message.
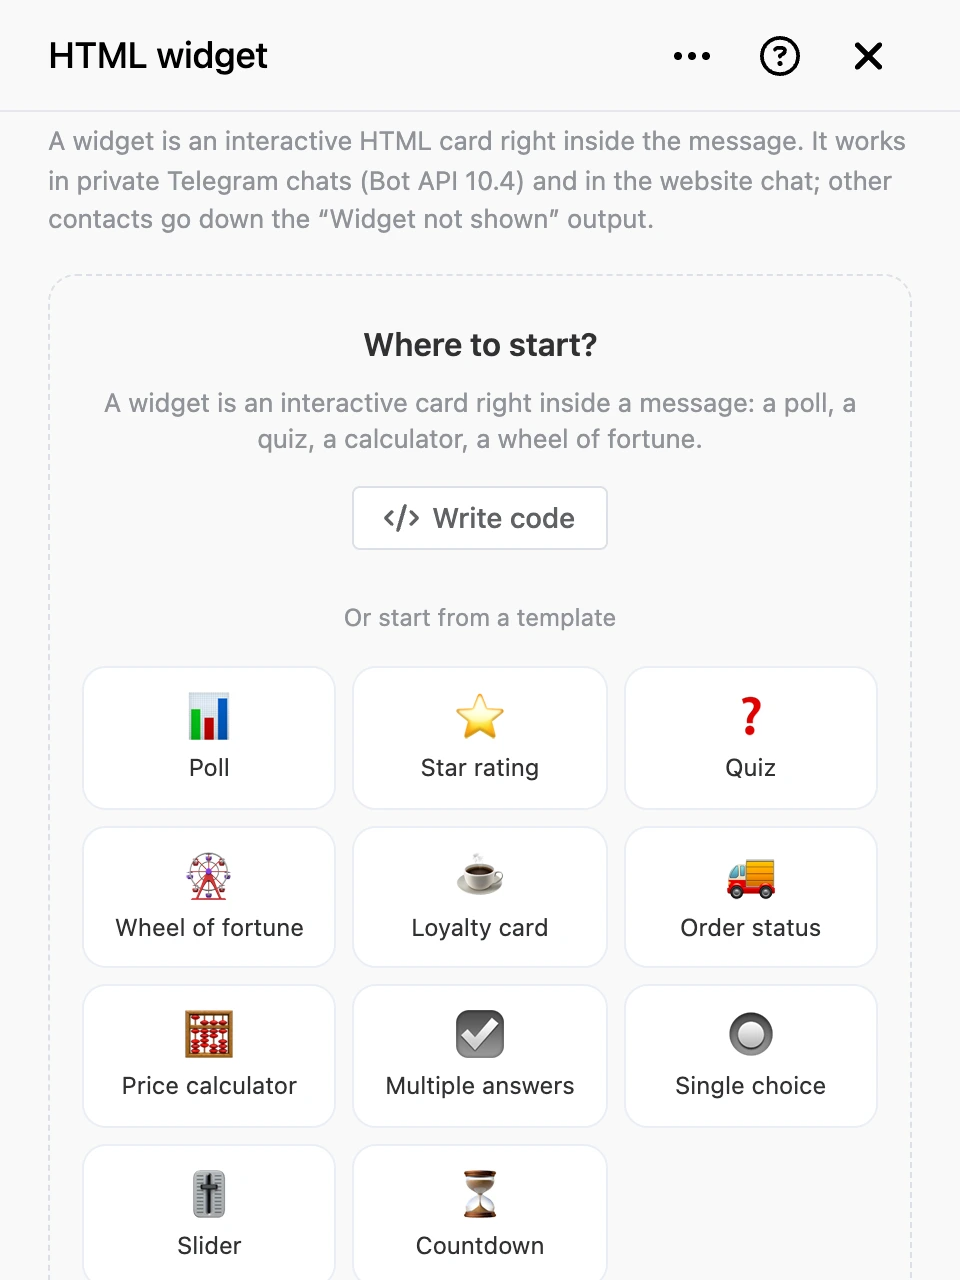
Where to start
In a new block, the panel offers three ways:
- "Describe for AI" — opens the "Create with AI" panel: describe the card in words, and the AI writes its code and data.
- "Write code" — opens an empty HTML editor.
- A template — a ready-made card that you only need to adapt.
Templates: "Poll", "Star rating", "Quiz", "Countdown", "Multiple answers", "Single choice", "Slider", "Wheel of fortune", "Loyalty card", "Order status" and "Price calculator". After you pick a template, a hint appears under the field: which answers to add and where to change the texts. You can also pick a template later — the "Templates" button above the editor. The chosen template replaces the widget's code and data.
Settings
The code, data and preview are in the tabs above the editor:
- "HTML code" — the widget's markup, styles and script. Under the field you see its size and its size after compression.
- "Data" — the data of this message (
chat_data), up to 1024 bytes, usually JSON. The widget reads it asTelegramWidget.chatData. It is handy to keep texts and options here and keep the code shared. - "Preview" — how the card looks and works. The ☀/☾ switch changes the light and dark theme, "Restart" starts the widget again. The requests the widget would send to the bot appear under the preview.
- "Side by side" — code and preview at once. The tab expands the panel to full screen and returns it when you switch to another tab.
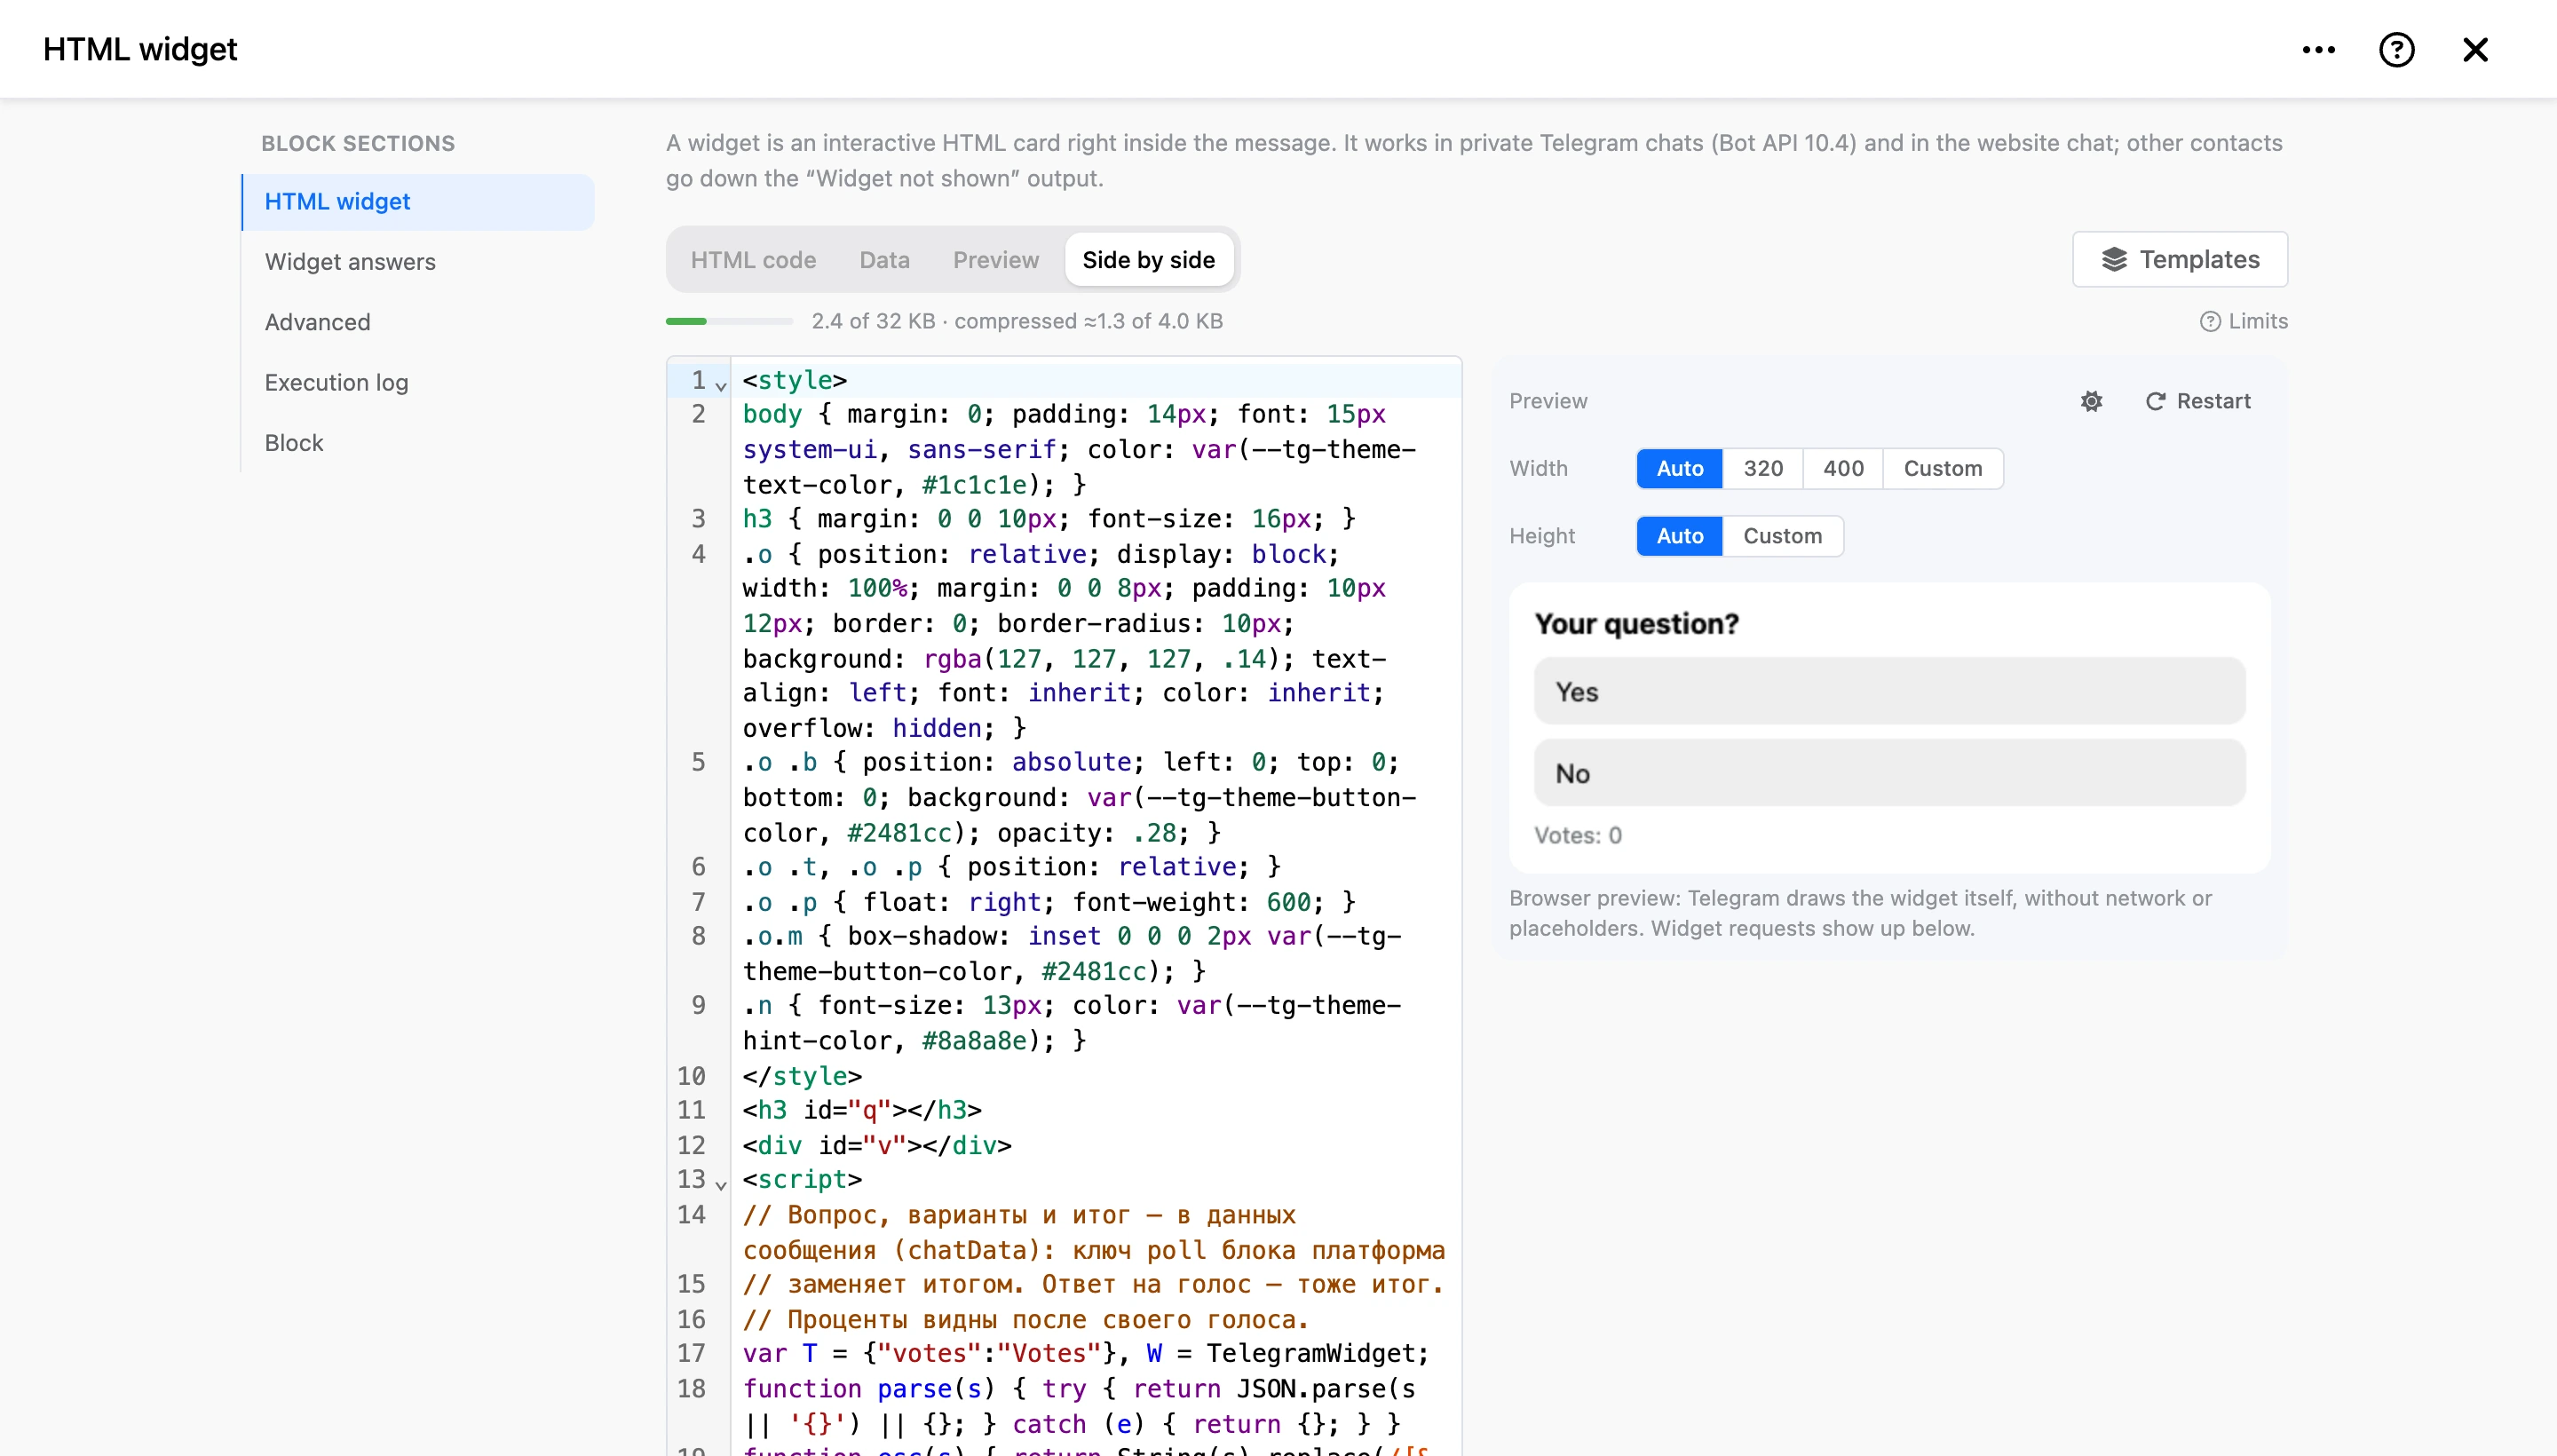
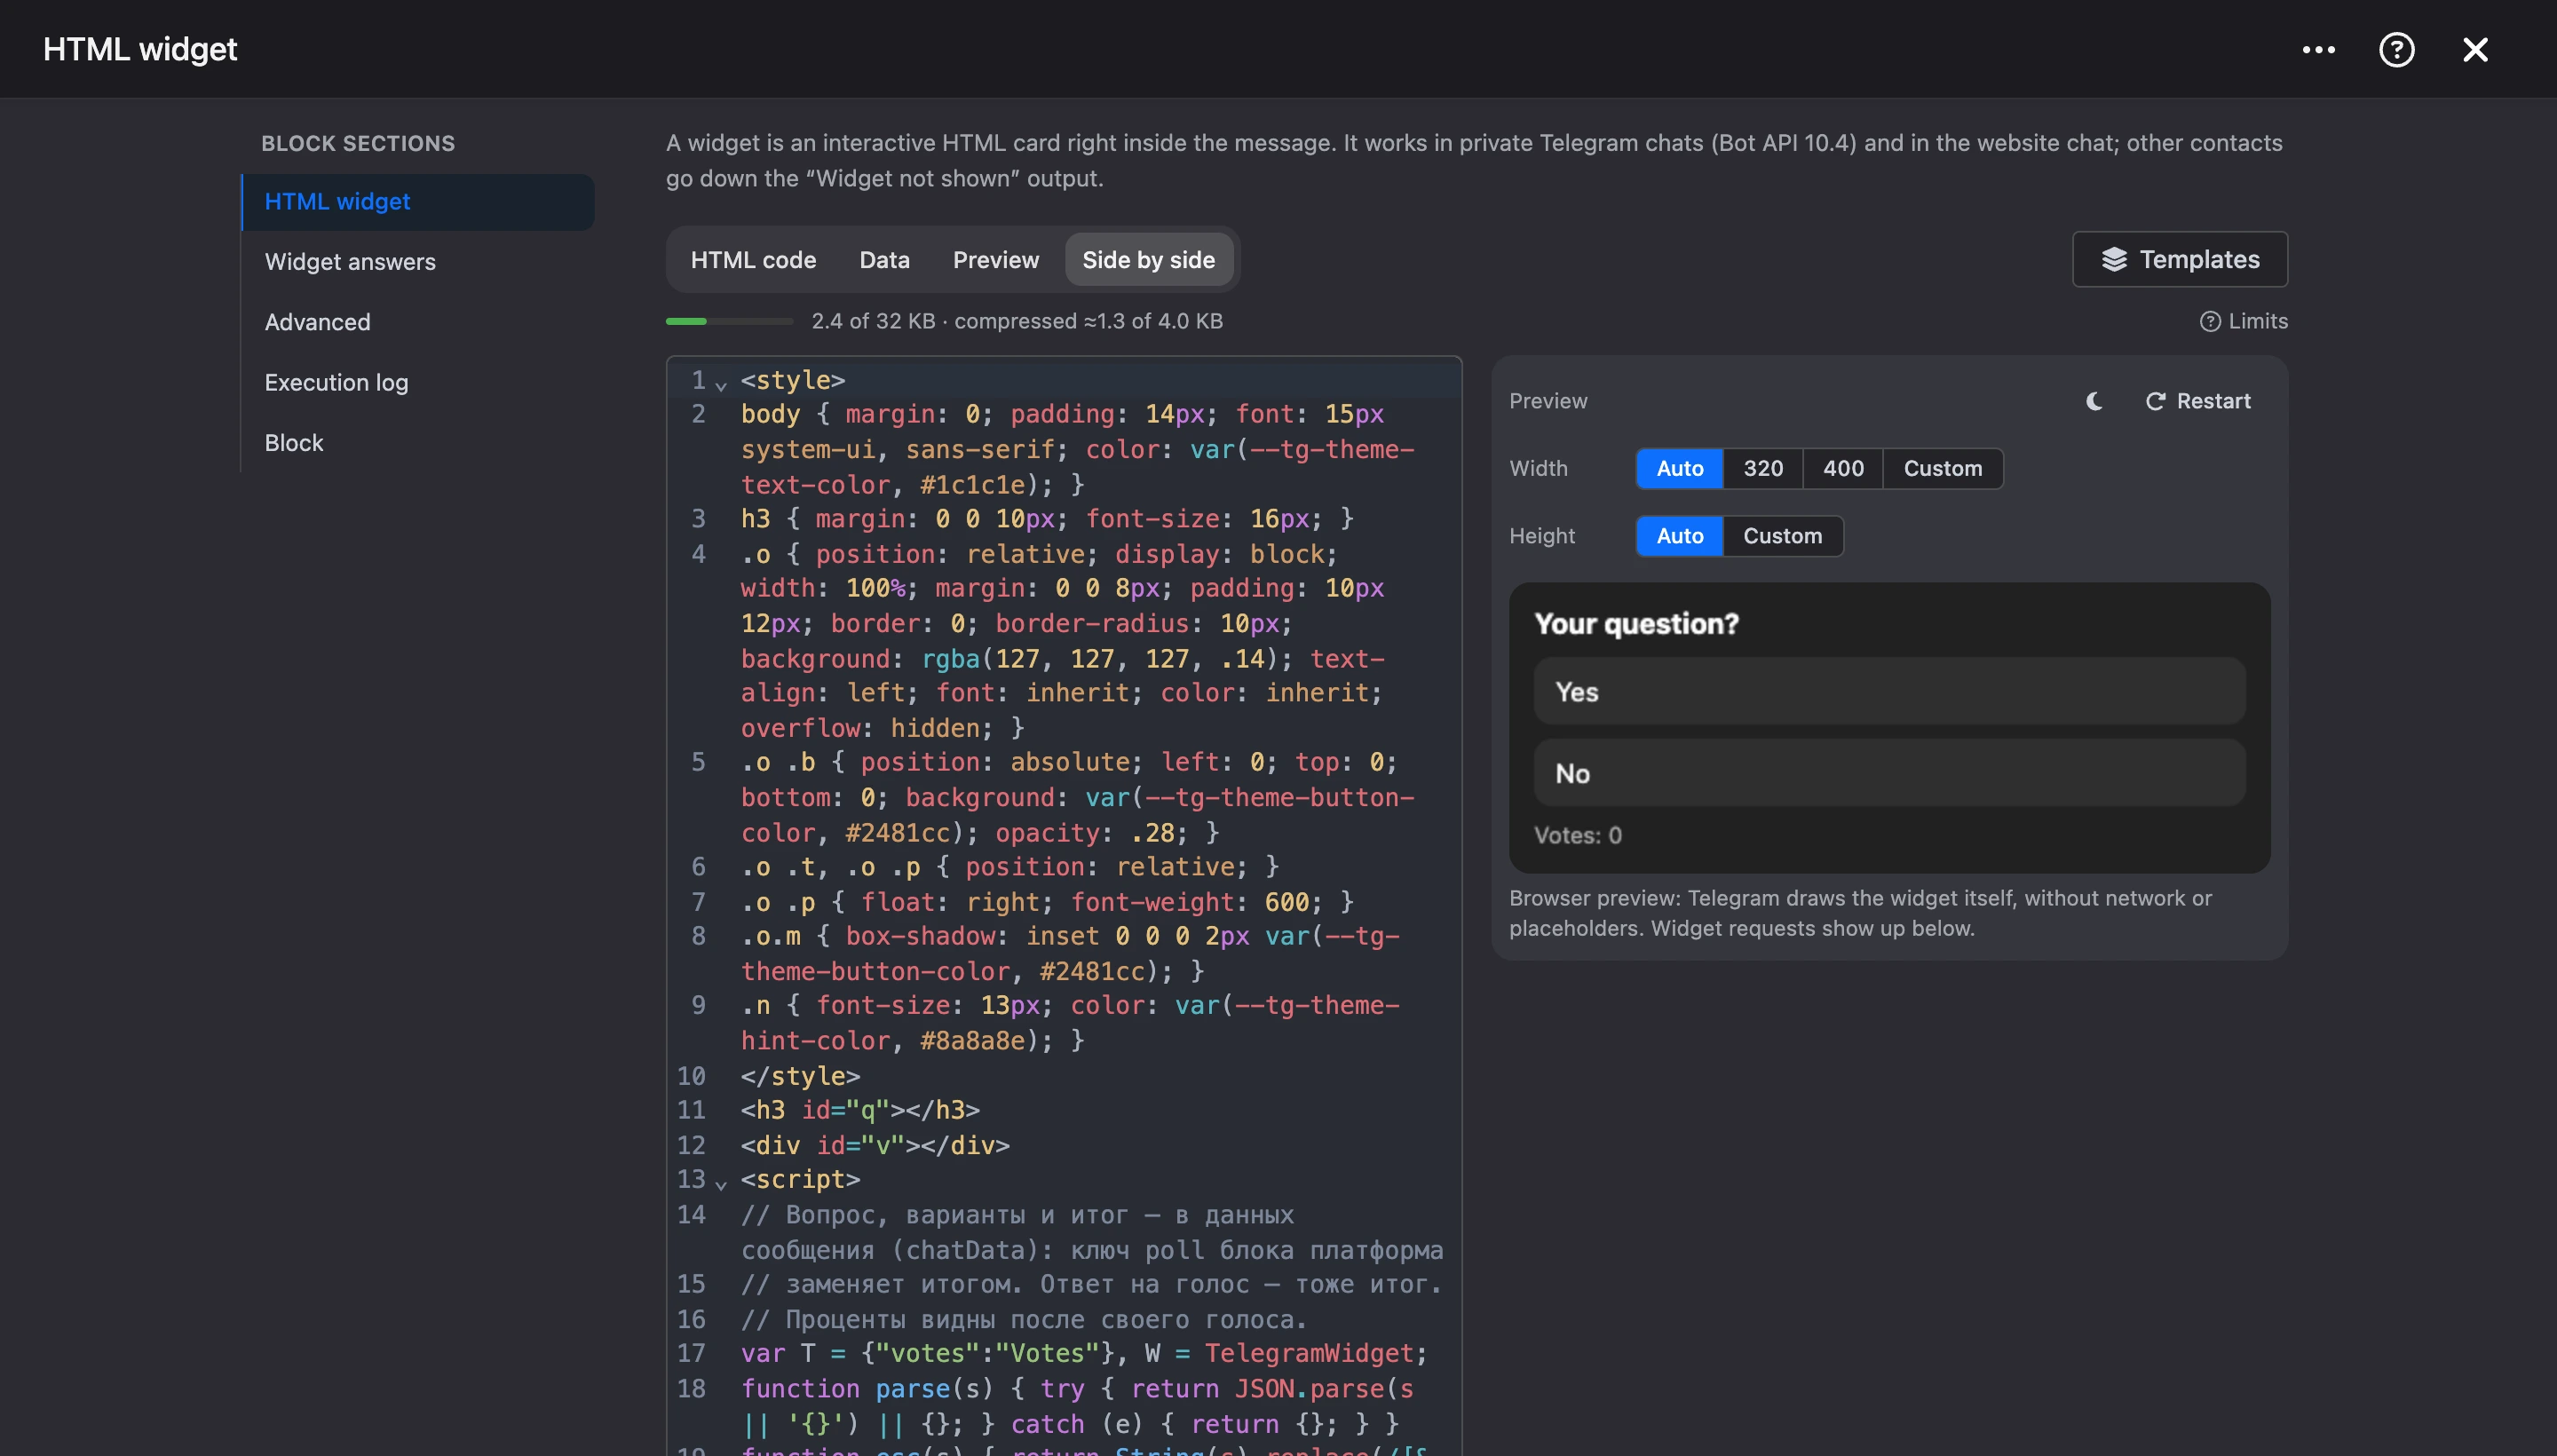
Above the preview is the widget size:
- "Width" — "Auto" (the width of the message), 320, 400 or "Custom" — from 200 to 600 points.
- "Height" — "Auto" (by content) or "Custom" — from 50 to 600 points. Whatever does not fit is clipped: there is no scrolling inside the widget.
Below the editor:
- "Caption" — text under the widget, up to 1024 characters.
- "Widget answers" — the block's outputs, see below.
- "Advanced" — "Write the answer to the user variable" and "Deliver silently", see "Advanced".
Templates work in the code and data: {{ $name }} is replaced before sending. The preview shows the code as is, without substitutions.
Limits
- The code is up to 32 KB and up to 4 KB after compression. If it does not fit, you can still save it, but the widget will not go out: the contact goes down the "Widget not shown" output, and the reason appears in the "Execution log".
- There is no network: the widget cannot load scripts, styles, fonts and images by link and does not send requests. Images only as inline SVG or a
data:address. - The data of one tap is up to 52 bytes: about 50 Latin letters.
- A message with a widget cannot be forwarded or saved.
Answers and outputs
A button inside the widget calls TelegramWidget.request('yes') — and the contact goes down the "yes" output, as if they pressed a button with that text. The contact does not see these buttons: they only link taps in the widget to the scenario.
- Widget answers — add an answer for each value the widget sends.
- "Any other answer" — the widget sent a value that is not among the answers. To save it, turn on "Write the answer to the user variable".
- "Widget not shown" — the contact is not from Telegram or the website chat, the code is over the limit, or Telegram refused the message. Connect the output to a regular message with the same meaning.
- "Continue" — visible only on the scheme: the bot moves on without waiting for a tap.
Taps on old widgets in the chat history also come to this block.
Reply to the widget and new state
After the output, the scenario can reply to the widget — set contact variables, for example with the "Variable operation" or "JavaScript interpreter" block:
widget_answer— what the widget gets in response to its request:TelegramWidget.request()returns{ result }with this value.widget_chat_data— new data for the tapped widget: the card is redrawn in the same message.
The widget's own code has to redraw the card: on new data the platform sends it the chatDataChanged event. Put the drawing into a function and call it both on load and on the event — otherwise the card stays as it was. The ready-made templates already work this way.
function render() {
    const data = JSON.parse(TelegramWidget.chatData || '{}')
    // …
}
render()
TelegramWidget.onEvent('chatDataChanged', render)
To update the widget later — for example, when an order is paid — use the "Update HTML widget" block.
Poll and wheel of fortune
Two keys in the widget data turn on ready-made mechanics, no scenario needed:
"poll": ["Yes", "No"]— a poll, up to 10 options. The platform counts the votes itself: one vote per contact, a repeated vote changes the choice. The widget gets the result: the options, the number of votes and the contact's own choice."prizes": ["5% off", …]— a wheel of fortune. The platform picks the prize: at random and once per contact.
The chosen option or the prize won is written to the widget_result contact variable before the output is taken — you can put it straight into the next message: "Your prize: {{ $widget_result }}".
Widgets from the AI agent
The AI agent can send widgets too — turn on the "HTML widgets" tool in the AI Agent block. A tap in the agent's card comes to it as a message from the contact.